Taking a few minutes to inspect your motorcycle before riding can save you from breakdowns and accidents. The T-CLOCS method is a simple system that helps you check all critical components including tires, controls, lights, oil, chassis, and stands. A proper pre-ride inspection significantly reduces your risk of mechanical failures and increases your chances of arriving safely at your destination.

Many riders skip safety checks when they’re eager to hit the road, but this shortcut can lead to dangerous situations. Walking around your motorcycle and visually examining key components takes only a few minutes. Pay special attention to your tires, looking for damage like cuts or bulges, and check that your brakes respond properly when tested.
Key Takeaways
- Regular pre-ride inspections using the T-CLOCS method help identify potential mechanical issues before they become dangerous.
- Checking tires, brakes, fluids, and controls takes minimal time but provides maximum safety benefits.
- Pre-ride inspections should become an automatic habit performed before every ride regardless of distance.
Understanding the Importance of a Pre-Ride Safety Inspection

A thorough motorcycle inspection before riding can prevent accidents and mechanical failures on the road. Regular checks help riders identify potential issues before they become dangerous or costly.
Why Conduct Daily Inspections
Daily inspections help riders catch small problems before they turn into bigger ones. A quick walk around the motorcycle can reveal loose parts, leaks, or worn components that might cause trouble during a ride.
The main benefit of these checks is developing familiarity with how the motorcycle normally looks and functions. When something changes, the rider will notice it immediately.
Regular pre-ride inspections become a habit that takes only a few minutes but provides significant safety benefits. Many experienced riders report that their daily checks have prevented breakdowns and potential accidents numerous times.
Components to check daily include:
- Tires (pressure and condition)
- Lights and signals
- Fluid levels
- Brakes
- Chain tension
Risks of Skipping a Pre-Ride Check
Neglecting pre-ride inspections can lead to dangerous situations on the road. A motorcycle with structural issues like cracks or damage to the frame could fail at high speeds or during emergency maneuvers.
Worn brake pads or low brake fluid might not be noticeable until the rider needs to stop quickly. By then, it’s too late to fix the problem.
Tire issues are particularly dangerous. Under-inflated tires can overheat and blow out, while worn tread increases the risk of skidding in wet conditions.
Mechanical failures while riding often lead to:
- Loss of control
- Sudden stops in traffic
- Being stranded in unsafe locations
- Costly roadside repairs
How the Owner’s Manual Can Help
The motorcycle’s owner’s manual contains specific information about inspection points for each particular model. This resource outlines exactly what should be checked and how often.
Manufacturers include detailed diagrams showing where important components are located. They also provide specifications like proper tire pressure, fluid levels, and chain tension.
The manual typically highlights critical safety components that need regular attention. It often includes a pre-ride inspection checklist that riders can follow step-by-step.
For new riders, the owner’s manual offers guidance on how to identify warning signs of wear or damage. It explains what “normal” looks like so abnormalities become easier to spot.
Many manuals now include QR codes linking to videos demonstrating proper inspection techniques for that specific motorcycle model.
Checking Tyres and Wheels

Your motorcycle’s tyres and wheels are crucial safety components that connect you to the road. Regular inspection ensures optimal performance and helps prevent dangerous situations while riding.
Inspecting Tyre Pressure and Tread Depth
Always check tyre pressure when the tyres are cold, ideally before riding. Use a reliable pressure gauge to measure current PSI and compare it to the manufacturer’s specifications, usually found in your owner’s manual or on a sticker on the motorcycle.
Proper tyre pressure provides better handling, longer tyre life, and improved fuel economy. Underinflated tyres can overheat and fail, while overinflated tyres reduce traction and ride comfort.
For tread depth, look for the wear indicators built into the tyre grooves. These small raised bars become visible when your tread wears down to approximately 1.6mm (1/16 inch). If you can see these indicators, it’s time to replace the tyre.
Looking for Tyre Wear or Damage
Examine the entire tyre surface for signs of damage. This includes cuts, cracks, bulges, punctures, and embedded objects like nails or glass shards.
Uneven wear patterns often indicate alignment or suspension issues. If one side of the tyre shows more wear than the other, have your motorcycle checked by a professional.
Check the tyre sidewalls for cracks or damage from impacts with curbs or potholes. Sidewall damage is particularly dangerous as it can lead to sudden tyre failure.
Age matters too. Even with good tread depth, tyres over 5-7 years old may have deteriorated rubber compounds that reduce performance and safety.
Assessing Wheel Condition
Inspect your wheels for any bends, cracks, or other damage. A damaged wheel can affect handling and potentially cause catastrophic failure at speed.
For spoked wheels, check for loose, broken, or missing spokes by gently tapping each spoke with a small wrench. They should all produce a similar tone if properly tensioned.
Spin each wheel to ensure it rotates freely without wobbling. Any lateral movement could indicate worn wheel bearings or an improperly mounted tyre.
Look for any corrosion on alloy wheels that might weaken the structure. Pay special attention to the area around the valve stem and rim edges where damage often occurs first.
Evaluating Brakes and Brake Pads

Proper functioning brakes are essential for motorcycle safety. Regular inspection of brake components ensures optimal stopping power and prevents potential failures when you need them most.
Examining Brake Pad Thickness
Brake pads wear down with use and need regular inspection. Look for the wear indicator groove on the pad surface – when this disappears, replacement is necessary.
Most motorcycle brake pads have visual indicators that make checking simple. The indicator is usually a groove or line that fades as the pad wears down.
Remove the wheel or use a flashlight to examine pad thickness if visual inspection is difficult. For most motorcycles, pads should be replaced when they’re less than 2mm thick.
Uneven wear patterns might indicate caliper problems or misalignment. Look for glazing (shiny surface) on pads, which reduces braking effectiveness.
Warning signs of worn brake pads:
- Squealing or grinding noises when braking
- Reduced braking power
- Vibration when applying brakes
- Visible thinning of pad material
Checking Brake Fluid Levels
Brake fluid levels directly impact braking performance. Locate the brake fluid reservoir on your handlebars (front brake) and near the rear brake pedal.
The reservoir should have “MIN” and “MAX” markings visible through the sight glass. Fluid should be between these levels – never below minimum.
Check the fluid color as well. Fresh brake fluid is clear to amber in color. Dark brown or black fluid indicates contamination and needs replacement.
Important brake fluid tips:
- Check levels with motorcycle on level ground
- Only use manufacturer-recommended DOT fluid type
- Replace caps tightly after checking
- Wipe up any spilled fluid immediately as it damages paint
Low fluid levels may indicate pad wear or a leak in the system. Look for wet spots or stains around brake lines and connections.
Testing Brake Function
Physical testing confirms that brakes are working properly. Begin by depressing the rear brake pedal and pulling the front brake lever to check for proper resistance.
There should be some free play before resistance builds. Too much travel before engagement indicates air in lines or worn pads.
Verify that both brake lights illuminate when each brake is applied. This ensures other drivers will be alerted when you slow down.
Test brakes at low speed in a safe area. Both brakes should engage smoothly without grabbing or pulsating. The motorcycle should stop in a straight line without pulling to either side.
Feel for any sponginess in the lever or pedal, which indicates air in the system. Brakes should feel firm and responsive.
Inspecting Motorcycle Fluids

Proper fluid levels and condition are crucial for your motorcycle’s performance and longevity. Checking fluids should be part of every pre-ride inspection to prevent mechanical failures and ensure safe riding.
Monitoring Engine Oil Level
To check your motorcycle’s oil level, start with the bike on level ground. Most motorcycles need to be upright rather than on the side stand for an accurate reading. Let the engine warm up, then shut it off for a few minutes before checking.
Locate the dipstick or sight glass on your engine. For dipsticks, remove it, wipe clean, reinsert, and check the level against the marks. For sight glasses, the oil should be visible between the minimum and maximum lines.
Oil should appear clear to amber, not dark or milky. Dark oil indicates it needs changing, while milky oil suggests coolant contamination.
The engine oil level should be checked before every ride, especially on longer trips. Low oil can cause engine damage within minutes of operation.
Checking for Leaks
Fluid leaks often signal potential problems that could lead to component failure. Before mounting your motorcycle, look at the ground where it was parked for any under bike leaks.
Different fluids have distinct characteristics:
- Oil leaks: Dark brown or black spots
- Coolant leaks: Green, orange, or pink residue, often sticky
- Brake fluid: Clear to slightly yellow, extremely slippery
- Fuel leaks: Strong odor, clear liquid that evaporates quickly
Inspect around seals, gaskets, and fluid reservoirs for wetness or staining. Pay special attention to your brake lines and master cylinders, as brake fluid leaks are particularly dangerous.
A thorough inspection of your motorcycle’s underside can reveal issues before they become serious problems during your ride.
Verifying Controls and Handlebars

Proper function of your motorcycle’s controls and handlebars is crucial for safe riding. Regular checks ensure responsive handling and help prevent accidents during your journey.
Testing Throttle and Clutch Operation
Begin by checking that your throttle moves easily without sticking or binding. Turn the handlebars from lock to lock while operating the throttle to ensure smooth operation throughout the full range of motion.
Test the clutch lever for proper free play—typically 2-3mm. The lever should engage smoothly without excessive resistance or a spongy feel.
Verify that both levers (clutch and front brake) are securely mounted and not bent from previous drops or impacts. The levers should return to their resting position immediately when released.
Check that your hand grips are securely attached to the handlebars. Loose grips can rotate during riding, potentially causing loss of control in critical situations.
Ensuring Handlebar Alignment
Examine the handlebars for proper alignment. Stand in front of your motorcycle and verify the bars are perpendicular to the direction of travel. Misalignment can indicate steering head bearing issues or frame damage.
Test for play in the steering head bearings by applying the front brake and gently rocking the motorcycle forward and backward. Excessive movement indicates worn bearings that require immediate attention.
Check that the handlebars turn freely from lock to lock without catching or binding. Stiff spots in the steering can indicate damaged bearings or improper adjustment.
Verify all handlebar-mounted controls (turn signals, horn, lights) function properly. Each switch should operate with definitive clicks and immediately activate its corresponding function.
Assessing Chain Tension and Drive Components

The drive system of your motorcycle transfers power from the engine to the wheel. Proper maintenance of your chain or belt is crucial for safety and performance during your ride.
Inspecting Chain Tension
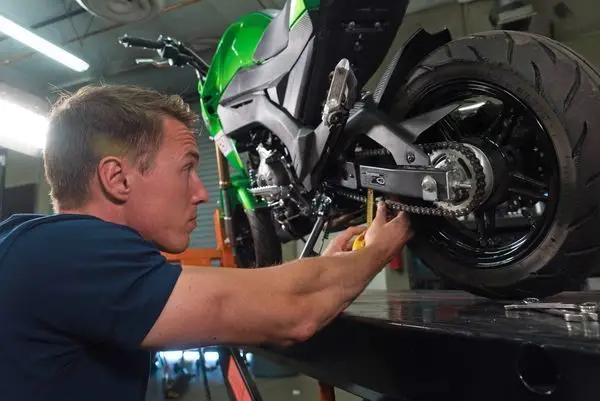
Chain tension must be checked before every ride as it can change with use. First, locate the tightest point by rotating the rear wheel slowly while observing the chain. Most motorcycles have a specification for proper chain slack, usually between 1-1.5 inches (25-38mm) of movement.
To check tension, place your motorcycle on its center stand or have someone hold it upright. Press up and down on the bottom run of the chain at the midpoint between the sprockets. The chain should move within the manufacturer’s recommended range.
Too tight? The chain could stretch or damage bearings. Too loose? It might slip off the sprockets or cause jerky power delivery.
Also inspect sprockets for:
- Hooked or worn teeth
- Missing teeth
- Secure mounting
Lubricating the Chain
A properly lubricated chain extends the life of your drive system and ensures smooth operation. Apply lubricant when the chain is warm after a ride for better penetration into the links.
Position your motorcycle securely on a stand. Clean the chain first using a brush or specialized chain cleaner to remove dirt and old lubricant. This step prevents grit from acting as an abrasive.
Apply lubricant specifically designed for motorcycle chains while rotating the rear wheel. Focus on the inside of the chain where it contacts the sprockets.
Be careful not to over-lubricate as excess will fling onto your wheel, tire, and motorcycle body. Wipe away any excess with a clean cloth.
Remember to check for objects stuck in the chain like rocks or debris that could cause damage.
Checking Lights and Electrical Systems

Properly functioning lights and electrical systems are critical for motorcycle safety and visibility on the road. Regular inspection ensures you can see the road clearly and that other drivers can see you.
Verifying Headlights and Tail Lights
Start by checking your headlamp and brake lights with the engine running. Turn on the headlight and verify both low and high beams work properly.
Examine the headlight lens for cracks or damage that might reduce visibility. A damaged lens can scatter light incorrectly, reducing your ability to see at night.
For tail lights, press both front and rear brake levers separately to ensure the brake light activates from either control. The brake light should illuminate immediately when either brake is applied.
Check for any loose wiring connections around the lights. Battery terminals should be clean and tightly connected to ensure reliable power to all electrical components.
Inspecting Turn Signals
Test all turn signals by activating them and walking around the motorcycle to verify each one flashes properly. Both front and rear signals on each side should work correctly.
Inspect signal lenses for cracks or damage. Broken lenses can allow water inside, causing electrical shorts or premature bulb failure.
Many riders overlook signal inspection, but it’s recommended to check turn signals before every ride. Functioning signals are essential for communicating your intentions to other drivers.
If a signal flashes too quickly or slowly, this typically indicates a bulb is out or there’s an electrical issue that needs attention. Normal flash rate is about once per second.
Reviewing Fuel Quantity and Monitoring Gauges

Proper fuel management is essential for a safe and stress-free motorcycle ride. Running out of fuel can leave you stranded in potentially dangerous situations, making this check a critical part of your pre-ride inspection.
Checking Fuel Quantity Manually
Even on motorcycles with fuel gauges, a manual check provides the most accurate assessment. Remove the fuel cap and visually inspect the level by looking inside the tank. For motorcycles without a clear view, use the “shake test” by gently rocking the bike from side to side to hear and feel the fuel moving.
On motorcycles with a reserve function, switch to reserve before your ride to confirm it’s working properly, then switch back to the main tank. This ensures your safety net is functional when needed.
Physically checking the fuel level is particularly important if the bike hasn’t been ridden for several weeks, as gauges can sometimes provide inaccurate readings after periods of non-use.
Reading the Fuel Gauge
Modern motorcycles typically feature either analog or digital fuel gauges. Familiarize yourself with your specific gauge’s behavior and accuracy. Note that many motorcycle fuel gauges show “full” for the first quarter of the tank, then drop quickly.
Some motorcycles have fuel warning lights instead of gauges. Learn at what point these activate – typically when 1-2 gallons remain. Don’t rely solely on warning lights for long journeys.
Digital displays often provide more precise readings, sometimes showing remaining miles or kilometers. However, these estimates vary based on riding style and conditions.
Always cross-reference gauge readings with your odometer and knowledge of your bike’s typical range. Most motorcycles can travel 120-200 miles on a tank, depending on the model and riding conditions.
Final Pre-Ride Visual and Environmental Checks

Before hitting the road, take a moment to assess your surroundings and potential hazards that could impact your ride. A quick environmental scan can mean the difference between a safe journey and an unexpected incident.
Identifying Road Conditions
Road conditions significantly affect motorcycle safety and handling. Before departure, check the current weather forecast and how it might impact your route. Rain, ice, snow, or extreme heat can all create dangerous riding situations.
Look for wet patches, oil slicks, gravel, sand, or debris that might reduce traction. T-CLOCS pre-ride inspections help ensure your motorcycle is ready, but road awareness is equally important.
Be mindful of construction zones which often feature loose gravel, uneven pavement, or temporary lane markings. These areas require extra caution and reduced speeds.
Recent weather changes demand special attention. After rain, watch for puddles and slippery surfaces, especially at intersections where oil accumulates.
Scanning for Obvious Hazards
A thorough scan of the immediate environment helps identify potential dangers before they become problems. Check for vehicles with drivers who might exit without looking or doors that could suddenly open.
Look for pedestrians, especially children or pets who might dart into your path unexpectedly. Busy parking lots deserve extra attention as visibility is often limited.
Be aware of blind spots in your riding environment – areas obscured by buildings, vegetation, or other vehicles.
Consider the time of day and how it affects visibility. Dawn and dusk create glare conditions while night riding requires properly functioning lights and reflective gear.
Traffic patterns are also important to note. Rush hour, school zones, or special events can all create unexpected hazards that might affect your ride.
Frequently Asked Questions

Pre-ride motorcycle inspections involve checking critical components to ensure safety. These regular checks identify potential issues before they cause problems on the road and help prevent accidents or breakdowns.
What are the essential elements of a pre-ride motorcycle inspection?
A thorough motorcycle inspection follows the T-CLOCS method: Tires & Wheels, Controls, Lights, Oil & Fluids, Chassis, and Stands. This comprehensive checklist helps riders systematically examine their motorcycle’s critical systems.
Many riders perform quick inspections before each ride and more detailed checks weekly. This balanced approach keeps the motorcycle in good condition without becoming too time-consuming.
The best time for a detailed inspection is actually after completing a ride, as this provides time to address any issues before the next journey.
How do you check your motorcycle’s tires and wheels before a ride?
Inspect tires for proper tread depth, signs of uneven wear, and any embedded objects. Look for weathering, cracks, or bulges that might indicate tire damage.
Check tire pressure when the tires are cold for an accurate reading. Under-inflated tires affect handling and fuel efficiency, while over-inflated tires reduce traction.
Examine wheels for bent rims, loose or missing spokes, and any signs of damage. Spin each wheel to ensure they rotate freely without wobbling.
What should you inspect in the motorcycle’s controls before starting your journey?
Test the throttle for smooth operation and proper spring-back when released. The throttle should return to idle position immediately when let go.
Check that the clutch lever operates smoothly and has the correct free play. Excessive resistance could indicate cable issues or internal clutch problems.
Verify that both front and rear brakes engage properly with adequate resistance. Look for proper brake lever free play and test brake light activation.
Which fluid levels are critical to verify during a motorcycle pre-ride inspection?
Engine oil level is essential to check before long rides. Low oil can cause catastrophic engine damage, while overfilled oil can leak or create excessive pressure.
Brake fluid levels should be within the recommended range in both front and rear reservoirs. Low brake fluid can indicate leaks or worn brake pads.
Coolant level (for liquid-cooled motorcycles) should be checked when the engine is cold. Proper coolant helps prevent overheating and protects engine components.
What are the key points to examine in the motorcycle’s lights and electrics before riding?
Test all lights including headlights (high and low beam), tail light, brake light, and turn signals. Proper lighting is crucial for visibility to other road users.
Check that the horn functions correctly. A working horn is an important safety feature for alerting others in emergency situations.
Verify that the battery terminals are clean and secure. Loose connections can cause electrical system failures while riding.
What is the proper way to assess the motorcycle’s chassis and suspension before a trip?
Inspect the frame for any cracks, dents, or signs of damage. Frame issues can significantly affect handling and safety.
Check suspension components by pressing down on the front and rear of the motorcycle to ensure smooth compression and rebound. Suspension problems can lead to poor handling.
Examine the chain for proper tension, lubrication, and signs of wear. A monthly chain maintenance routine helps prevent drive system failures and extends chain life.


