Belts and hoses are crucial parts of your car’s engine that need regular inspection to prevent unexpected breakdowns. These components control everything from your cooling system to power steering, making them essential for safe driving. Checking for cracks, fraying, glazing, or fluid leaks can help you identify potential problems before they lead to expensive repairs or leave you stranded on the roadside.

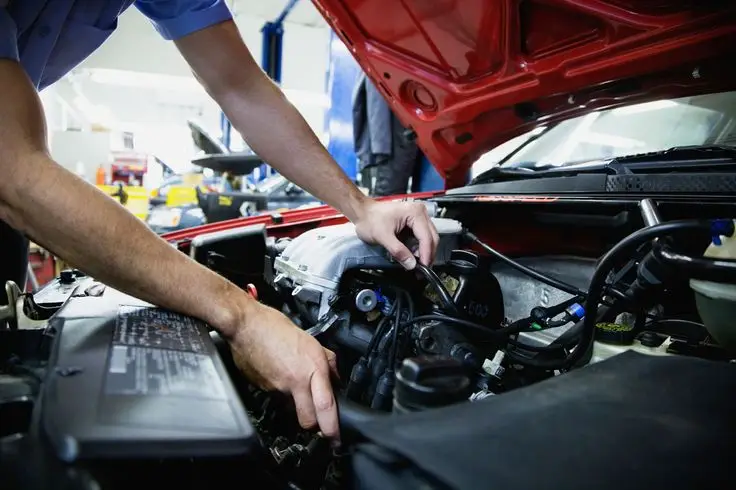
While a professional should examine these parts annually, car owners can perform basic visual inspections between service appointments. Looking under the hood regularly allows drivers to spot warning signs early. The process is simple enough for anyone to do and requires no special tools besides a flashlight and perhaps some gloves to protect hands from hot engine components.
Key Takeaways
- Regular inspection of belts and hoses can prevent unexpected breakdowns and extend the life of crucial engine components.
- Look for visible damage such as cracks, fraying, or glazing that indicates a belt or hose needs replacement.
- Both professional annual inspections and owner visual checks between service appointments help maintain optimal vehicle performance.
Why Belts and Hoses Are Critical for Your Vehicle

Belts and hoses form the crucial circulatory and power transfer systems of your vehicle. Without these components functioning properly, even the most powerful engine can fail within minutes.
The Roles of Belts in Engine Operation
The serpentine belt is often the most visible belt in modern vehicles, winding around multiple pulleys to drive several components simultaneously. This single belt typically powers the alternator, power steering pump, water pump, and air conditioning compressor.
Timing belts (or chains in some vehicles) coordinate the rotation of the crankshaft and camshaft, ensuring valves open and close at the right moments during engine operation. If a timing belt fails, valves and pistons can collide, causing catastrophic engine damage.
V-belts or drive belts may be found in older vehicles. Instead of one serpentine belt, these cars use multiple belts to power different accessories.
Each belt transfers power from the engine’s crankshaft to vital components. Without them, your vehicle’s electrical system would fail, steering would become difficult, and the engine would overheat.
How Hoses Support Vital Systems
Radiator hoses transport coolant between the engine and radiator, releasing heat that would otherwise damage engine components. The upper hose carries hot coolant from the engine to the radiator, while the lower hose returns cooled fluid back to the engine.
Heater hoses direct hot coolant to your vehicle’s heating system, providing warmth in cold weather. These smaller diameter hoses are often overlooked but equally important.
The bypass hose allows coolant to circulate even when the thermostat is closed, preventing hot spots in the engine.
Power steering hoses transfer hydraulic fluid under pressure, making steering effortless. Any leak can quickly lead to steering difficulty and potential pump damage.
Modern vehicles may use specialized silicone hoses in high-temperature areas for better durability and heat resistance.
Potential Consequences of Neglecting Belts and Hoses
A failed serpentine belt can cause immediate loss of power steering, electrical charging, and cooling functions. You might find yourself stranded with a dead battery or overheated engine.
A broken timing belt can cause catastrophic engine damage within seconds. Valves may bend or break, requiring expensive repairs or even engine replacement.
Deteriorated hoses can fail suddenly, spraying hot coolant and causing:
- Immediate engine overheating
- Steam from under the hood
- Complete cooling system failure
- Potential engine warping or cracking
Coolant leaks from worn hoses waste fluid and introduce air into the system, reducing cooling efficiency even before complete failure occurs.
Preparing to Inspect Belts and Hoses Safely

Proper preparation ensures a thorough and safe inspection of your vehicle’s belts and hoses. Taking time to gather the right tools and understand the engine layout will make preventative maintenance more effective and reduce the risk of injury.
Gathering Necessary Tools and Materials
Before beginning any inspection, collect the necessary equipment:
- Flashlight or work light – Essential for seeing into dark areas of the engine bay
- Clean rags or paper towels – For wiping away dirt or fluid to better examine components
- Gloves – Protect hands from hot surfaces and chemicals
- Owner’s manual – Contains specific information about your vehicle’s components
- Notepad and pen – For recording observations and measurements
Many professional mechanics also recommend having a small mirror on an extendable handle to view hidden areas. For a thorough inspection, consider purchasing a belt tension gauge if you plan to check tension measurements against the specifications listed in your manual or found using your vehicle identification number (VIN).
Locating Belts and Hoses in the Engine Bay
Engine layouts vary significantly between vehicle makes and models. Most modern vehicles have the following key components to locate:
Drive belts are typically visible near the front of the engine and connect the crankshaft to various components like the alternator, power steering pump, and air conditioning compressor.
Hoses are rubber tubes that transport fluids throughout the engine. The two main types to inspect are:
- Radiator/coolant hoses (larger hoses connected to the radiator)
- Vacuum hoses (smaller hoses throughout the engine)
Original belts and hoses often have manufacturer markings that can help identify them correctly. Many members of the RV community find that creating a simple diagram of their specific engine layout helps track inspection results over time.
Ensuring Engine Safety Precautions
Safety must be the priority when working with engines. Always keep safety in mind during inspection procedures.
The engine should be completely off and cool before inspection begins. Hot engines can cause severe burns, and moving parts present serious injury risks. Allow at least 30 minutes after driving for the engine to cool down.
Disconnect the negative battery terminal to prevent electrical shorts or accidental starts. This step is particularly important when inspecting belts near electrical components.
Wear appropriate clothing without loose parts that could get caught in engine components. Remove jewelry, secure long hair, and consider eye protection as additional safety measures.
When inspecting an unfamiliar vehicle, reference the owner’s manual first to identify any model-specific safety concerns or special inspection procedures.
Step-by-Step Inspection of Belts

Regular inspection of your car’s belts can prevent unexpected breakdowns and costly repairs. Checking for visual damage, proper tension, and unusual noises will help you identify problems before they become serious.
Visually Assessing for Cracks and Fraying
Begin by locating the belts in your engine bay. The most common types are the serpentine belt (which drives multiple components) and timing belt (hidden behind covers in most vehicles). Some older vehicles may have multiple V-belts instead of a serpentine belt.
Turn off your engine completely and allow it to cool before inspection. Look carefully at the entire length of each visible belt for signs of cracks, fraying, splits or glazing. Pay special attention to the edges and ribs of the belt.
Belts naturally develop cracks and wear and tear over time. Small cracks across the ribs are normal, but deep cracks or missing chunks indicate deterioration requiring prompt replacement.
Also check for:
- Oil or fluid contamination
- Frayed edges
- Shiny, glazed surfaces
- Exposed belt cords
Checking Belt Tension and Alignment
Proper tension is crucial for belt function. A belt that’s too loose can slip, while one that’s too tight can damage bearings in the components it drives.
To check tension on a serpentine belt:
- Find a straight section of the belt between two pulleys
- Press firmly with your thumb in the middle of this section
- The belt should deflect about 1/2 inch
- Try twisting the belt 90 degrees – if it turns more, the tensioners may be failing
Examine belt alignment by checking that the belt runs straight across all pulleys. Misalignment causes uneven wear and can lead to premature belt replacement.
Many modern cars use automatic tensioners that maintain proper tension. Check if these tensioners move freely and maintain pressure.
Testing for Slippage and Squealing
Listen to your engine when it’s running. Squealing noises, especially during startup or when accelerating, often indicate belt slippage.
To test for slippage:
- Safely observe the belt while the engine runs at idle
- Look for jerky movement or vibration
- Check if belt speed matches pulley rotation
- Listen for chirping or squealing sounds
Slipping belts often show glazing on top and sides. This glossy appearance develops when friction heats the rubber surface.
Include belt inspection in your routine maintenance schedule. Most manufacturers recommend checking belts every 3,000-5,000 miles and replacing them every 60,000-100,000 miles, depending on the type of belt and driving conditions.
Inspecting Hoses for Signs of Damage

Regular inspection of your car’s hoses can prevent coolant leaks and overheating issues. A thorough check involves examining the physical condition of the hoses and testing their flexibility and connection points.
Examining for Leaks or Bulges
Start by visually inspecting all coolant hoses when the engine is cool. Look for any obvious signs of damage such as cracks, splits, or bulges in the rubber. These irregularities often indicate potential failure points.
Check for coolant tracks in the engine compartment that appear white, light green, blue, or pink. These stains are strong indicators of existing leaks.
Pay special attention to the radiator hoses, heater hoses, and bypass hose, as these carry hot coolant and experience the most stress. Silicone hoses might show different wear patterns than traditional rubber hoses.
A rapidly dropping coolant level is often the first sign of hose trouble, even before visible leaks appear.
Feeling for Soft Spots and Weakness
With the engine completely cool, gently squeeze the hoses to check their condition. A good hose should feel firm but slightly flexible.
If sections of the hose feel extremely soft or mushy, this indicates internal breakdown of the rubber. Conversely, hoses that feel brittle or hard have aged and lost their elasticity.
Pay special attention to bends in the hoses where cracks often develop first. These areas experience more stress and deteriorate faster than straight sections.
Testing should include the entire length of each hose, not just the visible portions. Sometimes deterioration begins under clamps or in hidden areas of the cooling system.
Evaluating Connections and Clamps
Examine where each hose connects to components like the radiator, water pump, and heater core. These junction points are common failure spots in the cooling system.
Check that clamps are tight but not overtightened, which can damage the hose material. Rust on metal clamps suggests they may need replacement to maintain proper sealing.
Inspect the hose junctions for signs of coolant seepage or wet spots. Even minor seepage indicates a potential failure point that requires attention.
Look for any hoses that appear to be pulling away from their connection points. This separation can occur gradually and lead to sudden failure if not corrected.
Spring-type clamps should maintain tension, while screw clamps should be secure without cutting into the hose material.
Recognizing When to Replace Belts and Hoses

Knowing the warning signs of failing belts and hoses can save you from costly repairs and roadside emergencies. Regular inspection of these components is crucial for your vehicle’s health and performance.
Common Indicators for Belt Replacement
The serpentine belt and timing belt are critical components that require routine maintenance. Signs of severe wear include visible cracks, fraying edges, and glazed surfaces.
Look for these specific warning signs:
- Cracks on the belt’s surface or edges
- Fraying or separation of belt material
- Glazing or shiny appearance on the belt surface
- Unusual noises like squealing or chirping when the engine runs
- Visible chunks missing from the belt
Many vehicle owners don’t realize that modern composite belts may not show wear until they fail. This makes preventative maintenance according to the manufacturer’s schedule especially important.
Drive belts and fan belts typically need replacement every 60,000-100,000 miles, even if they appear to be in good condition. The timing belt, which is crucial for engine operation, usually needs replacement every 60,000-90,000 miles.
Telltale Signs Hoses Need Replacement
Cooling system hoses deteriorate from the inside out, making visual inspection only partially effective. Radiator hoses, heater hoses, and other coolant hoses should be checked regularly for signs of wear and tear.
Key indicators of hose failure include:
- Soft or spongy texture when squeezed
- Hardened or brittle feel when cold
- Visible cracks or bulges in the hose material
- Leaking coolant around hose connections
- Collapsed sections indicating internal breakdown
A good inspection technique is to squeeze hoses while the engine is cool. They should feel firm but slightly flexible. If they feel too soft or too hard, replacement is likely needed.
Splits, separations, and cracking are clear indicators that hose replacement is necessary. Check connections carefully, as leaks often begin at the clamps or connection points before the hose itself fails completely.
Risks of Delaying Replacement
Postponing belt and hose replacement after identifying warning signs can lead to serious consequences. Failed belts can cause immediate loss of power steering, air conditioning, and alternator function.
The most severe risk comes from timing belt failure, which can cause:
- Catastrophic engine damage when valves and pistons collide
- Complete engine shutdown while driving
- Repair costs potentially exceeding thousands of dollars
For hoses, the risks include:
- Overheated engine due to coolant loss
- Stranded vehicle requiring towing
- Steam and hot coolant creating safety hazards
- Engine damage from operating without proper cooling
Spotting early signs of wear helps vehicle owners avoid these costly problems. While some drivers consider replacing all belts and hoses every 50,000 miles, most manufacturers recommend specific intervals based on vehicle model and driving conditions.
Best Practices for Ongoing Maintenance

Taking care of your car’s belts and hoses requires consistent attention and quality parts. Regular checks help prevent breakdowns and extend the life of these crucial components.
Setting an Inspection Schedule
Regular maintenance checks are vital for your vehicle’s belts and hoses. Inspect these components every 3,000 miles or during oil changes to catch problems early. This routine maintenance schedule helps prevent unexpected failures on the road.
For newer vehicles with original belts, manufacturers often recommend inspections at 60,000-mile intervals. However, rubber components degrade over time regardless of mileage.
Climate affects inspection frequency too. Extreme temperatures accelerate wear on both rubber belts and silicone hoses. Vehicles in hot climates or those frequently making short trips need more frequent checks.
Seasonal Inspection Schedule:
- Spring: Check for winter damage
- Fall: Prepare for cold weather stress
- Summer: Inspect before long trips
- Winter: Monitor for cold-related stiffness
Choosing Quality Replacement Parts
When replacement becomes necessary, selecting high-quality parts is crucial. OEM (Original Equipment Manufacturer) parts match your vehicle’s specifications perfectly, ensuring proper fit and function.
Aftermarket options can be cost-effective but vary in quality. Look for parts with warranties and made from premium materials like EPDM rubber for belts or reinforced silicone hoses for cooling systems.
Consider the following when selecting replacement components:
- Material quality: Premium rubber compounds resist cracking
- Reinforcement: Fiber-reinforced belts last longer
- Temperature rating: Parts rated for extreme conditions perform better
- Brand reputation: Established manufacturers have better quality control
Avoid the cheapest options, as they often lead to premature failure and more expensive repairs later.
Working with Professional Mechanics
While visual inspections can be done at home, professional mechanics should handle repairs. They have specialized tools to properly tension belts and secure hose connections.
A qualified technician can spot subtle signs of impending failure that might be missed during home inspections. They can also provide preventative maintenance recommendations based on your specific vehicle model.
When working with mechanics:
- Ask about their experience with your particular make and model
- Request OEM or high-quality aftermarket parts
- Keep maintenance records to track component age
- Inquire about warranty coverage for parts and labor
Listen for unusual noises like squealing, which often indicates belt problems, and report these symptoms to your mechanic for proper diagnosis.
Special Considerations for Specific Vehicles

Different vehicle types require unique approaches when inspecting belts and hoses. Larger vehicles often have more complex systems, while manufacturer guidelines vary significantly between makes and models.
Inspecting Belts and Hoses in RVs
RVs demand extra attention when checking belts and hoses due to their larger engines and extended periods of inactivity. The RV community often recommends more frequent inspections, especially before long trips.
Look for signs of weathering, as RVs are frequently exposed to extreme conditions. Check for parallel cracks in hoses, particularly around bends, which indicate ozone damage.
Serpentine belts in RVs should be inspected for glazing and cracks every 3,000 miles. Pay special attention to coolant hoses, as RV cooling systems work harder than standard vehicles.
For motorhomes, examine connections where hoses meet the radiator and engine, as these points experience higher stress due to the vehicle’s weight and size.
Understanding Manufacturer Recommendations
Vehicle manufacturers provide specific guidelines for belt and hose maintenance based on engineering specifications. These recommendations can be found in the owner’s manual or by referencing the VIN for detailed maintenance schedules.
Most manufacturers suggest inspecting belts and hoses every 30,000 to 60,000 miles, but this varies by make and model. Performance and luxury vehicles often require more frequent checks.
Important maintenance intervals:
- Economy vehicles: Every 60,000 miles
- Performance vehicles: Every 30,000 miles
- Hybrid vehicles: Special inspection for high-voltage cooling systems
Always compare aftermarket parts with original belts to ensure proper specifications. Some vehicles require specialized belts with unique grooves or materials that generic replacements may not provide.
Environmental Factors Affecting Belts and Hoses

Your car’s belts and hoses face constant exposure to harsh conditions that can accelerate their deterioration. Temperature extremes and chemical exposure create unique challenges for these essential rubber and silicone components.
Climate Impact on Rubber and Silicone
Heat is a primary enemy of engine belts and hoses. When temperatures rise above 180°F, rubber components can become glazed or slick, causing them to slip rather than grip properly. This slippage generates additional heat, creating a damaging cycle.
Cold weather presents different challenges. Freezing temperatures make rubber and silicone hoses brittle and less flexible. When a vehicle starts in cold weather, these stiffened components must suddenly handle pressure and movement, increasing the risk of cracks or splits.
Ozone exposure from air pollution creates distinctive parallel cracks around bends in hoses. These cracks start small but grow over time, weakening the structural integrity of the hose.
Humidity and moisture can also accelerate aging in both belts and hoses by promoting mold growth and material breakdown.
Chemical Exposure and Its Effects
Engine fluids present significant dangers to rubber and silicone components. Oil leaks are particularly harmful to belts, causing them to swell, soften, and lose tension. This chemical degradation can lead to premature belt failure even if no visible damage appears during casual inspection.
Coolant exposure affects hoses dramatically. When silicone hoses contact leaking coolant, they can develop a hardened, glassy surface indicating heat damage. This hardening reduces flexibility and creates weak points.
Road salt and de-icing chemicals can splash onto lower hoses and belts during winter driving. These corrosive substances accelerate wear on the outer surfaces and attack metal clamps and connectors.
Battery acid vapor is another hidden threat. In vehicles with batteries located near belts or hoses, acid vapor emissions can slowly eat away at these rubber components.
Summary and Next Steps

Regular inspection of your car’s belts and hoses is crucial for preventing breakdowns and expensive repairs. Check for cracks, fraying, or splits on belts, and look for glazing on the sides which can cause slipping.
For hoses, squeeze them to check flexibility. Hard or soft spots indicate deterioration. Also check for leaks and coolant tracks that are white, light green, blue, or pink in the engine compartment.
Inspection Schedule:
- Every 3 months for visual checks
- Every oil change for comprehensive inspection
- Immediately when unusual noises occur
If issues are found, replace belts and hoses promptly. Most mechanics recommend replacing them every 60,000-90,000 miles, even without visible damage.
Warning Signs Requiring Immediate Attention:
- Squealing noises when starting the car
- Visible cracks deeper than 1/8 inch
- Fluid leaks under the vehicle
- Engine overheating
Consider taking photos during each inspection to track wear over time. This creates a visual record to help identify gradual deterioration that might otherwise go unnoticed.
Remember that proper belt tension is important. Too tight can damage bearings, while too loose causes slipping and overheating. When in doubt, consult a professional mechanic.
Frequently Asked Questions

Regular inspection of your car’s belts and hoses helps prevent breakdowns and costly repairs. These components are critical for various systems including cooling, power steering, and alternator function.
What steps should be taken to inspect the drive belts in a vehicle?
To inspect drive belts, first make sure the engine is off and cool. Look for cracks, fraying, or splits on the top cover of the belt.
Check for glazing on the belt’s sides, which appears as a shiny surface. Glazed belts can slip, causing overheating or reduced performance.
Examine belts for proper tension. A belt that’s too loose may slip or make squealing noises, while one that’s too tight can damage bearings and components.
How frequently should belts and hoses be checked for wear and tear?
It’s recommended to check vehicle belts and hoses at least every three months or 3,000 miles, whichever comes first. This regular schedule helps catch issues before they lead to breakdowns.
Many mechanics suggest inspections during regular oil changes. This creates a convenient routine for preventative maintenance.
Drivers in extreme climates should check more frequently as heat, cold, and temperature fluctuations can accelerate wear.
What are the signs of wear or failure in automotive belts and hoses?
For belts, warning signs include cracks, fraying edges, missing chunks, glazing, and unusual noises like squealing or chirping. A belt that looks shiny or feels hard and inflexible needs replacement.
For hoses, look for bulges, soft spots, hardening, cracks, or leaks. Dampness, deposits, or dried coolant buildup around hose ends indicates a “cold leak” that should be addressed.
Unusual engine temperatures or steering difficulty can also signal belt or hose problems before visible damage appears.
What is the correct way to check for proper pulley and belt alignment?
To check alignment, observe the belt while the engine is off. The belt should sit centered in each pulley groove without hanging over edges.
Look down the length of the belt path to spot misalignments. The belt should run straight between pulleys without twisting or riding at angles.
Listen for squealing or chirping sounds when the engine runs, which often indicate misalignment issues that need correction.
During a vehicle inspection, how should hoses be examined for issues?
Inspect hoses while the engine is cool. Squeeze each hose gently along its entire length to check for consistent firmness. Soft spots or excessive hardness indicate deterioration.
Examine for bulges, cracks, or leaks along the entire hose. Pay special attention to bends and connection points where stress is highest.
Check hose clamps for tightness and proper positioning. Loose clamps or those that have shifted can allow leaks to develop even with good hoses.
How can you determine if a drive belt requires replacement after an inspection?
A belt needs replacement if it shows cracks deeper than 50% of the belt’s depth, or if pieces are missing from the ribs. Fraying edges or visible cord material always warrant immediate replacement.
If the belt has become hardened, glazed, or makes noise during operation, it should be replaced even if other damage isn’t visible.
Most manufacturers recommend replacing timing belts at specific intervals (typically 60,000-100,000 miles) regardless of condition due to their critical nature.


